Welcome to the Proof of Concept Room!
This room features technology that is being tested to determine the standard of what will be placed in classrooms of the future!
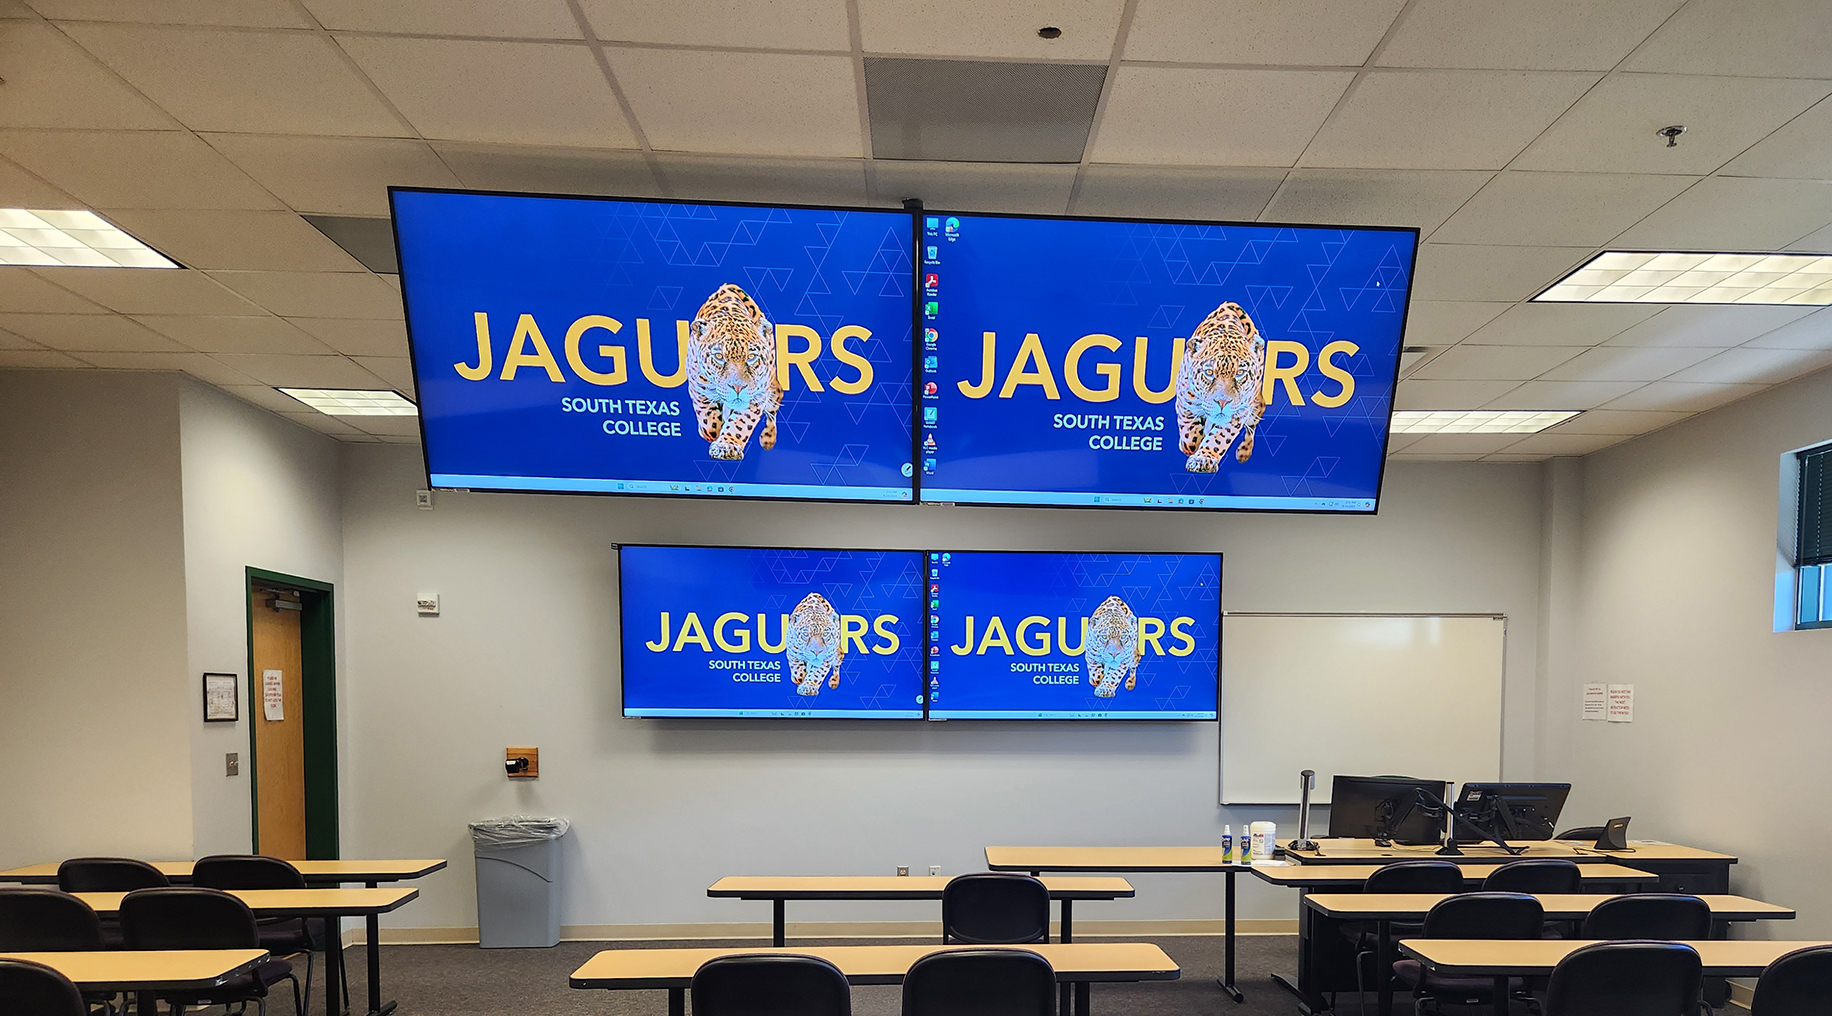
This room features the following:
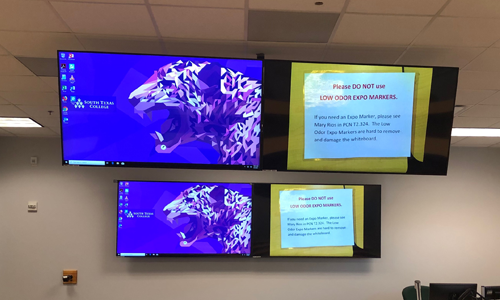
Dual Monitors and Dual Displays
This room features all dual displays, and gives the instructor the ability to share two pieces of content, or mirror the same content.
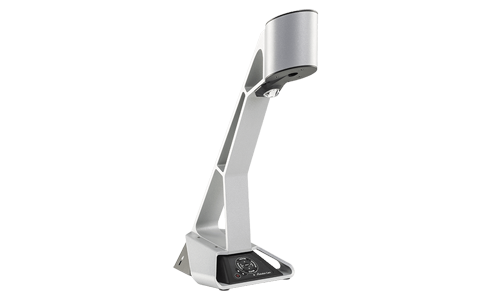
Table-Top Document Camera
This document camera has a crystal clear image, great lighting, and a stable base so it doesn’t shake!
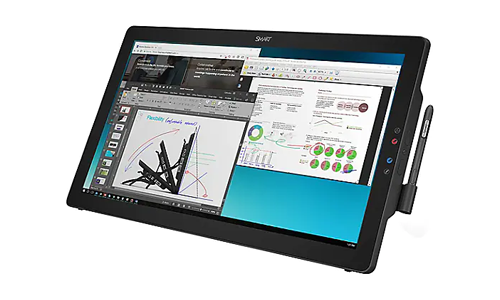
Smart Podium
The Smart Podium is an interactive monitor that responds to touch and stylus!
Here’s how you can get started with the room
- Step 1: Power On the Room
Step 1: Power on the Room
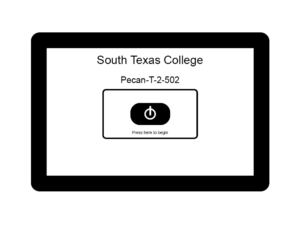
Go the touch panel and click the Power button. This will power on the displays on the wall, and the displays in the ceiling at the center of the room.
- Step 2: Choose a Source
Step 2: Choose a Source
After you’ve logged into the computer, decide what you want to share with the class. By default the room should have powered onto the PC source, so you should be seeing both the left and right side of the PC desktop.

If you want to change what’s being displayed, do the following:
- Basic Mode
Basic Mode
This mode provides simplified sources you can use to get started quickly:
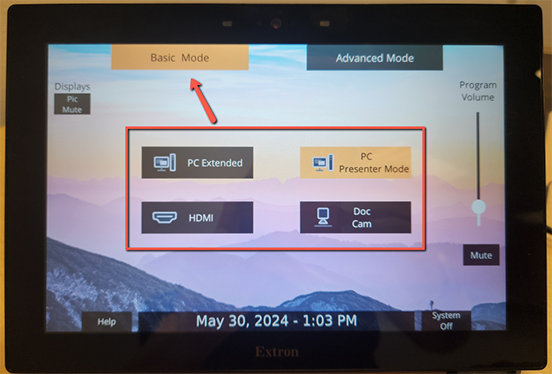
- PC Extended: Default setting and shows both desktop 1 and desktop 2 on all displays.
- PC Presenter Mode: Shows whatever the Smart Podium is showing on all displays. You’re other monitor becomes private and can be used for presenter’s notes, grading, or anything else you want to do (students won’t see this).
- HDMI: Mirrors any device you have plugged into the HDMI port at the lectern on all displays.
- Doc Cam: Shows the Document Camera on all displays
- Advanced Mode
This mode provides more advanced source switching and let’s you decide exactly what is shown on each display!
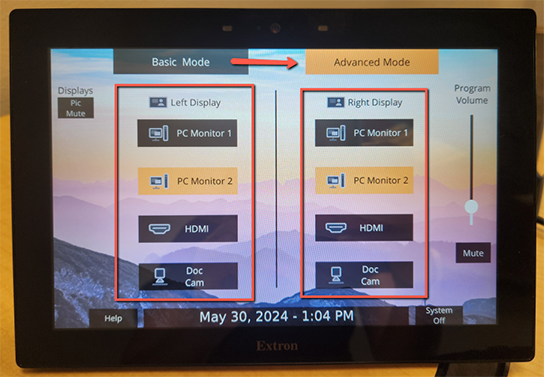
- Left Display matches the left monitor at your desk and the left display at the front of the room (display 1).
- Right Display matches the right monitor (smart podium) at your desk and the right display at the front of the room (display 2).
- Select any source under either to have that source show on that display.
- Basic Mode
- Using PowerPoint in Presenter Mode?
Want to see your presentation notes on the private monitor while using PowerPoint? Here’s how you can set this up:
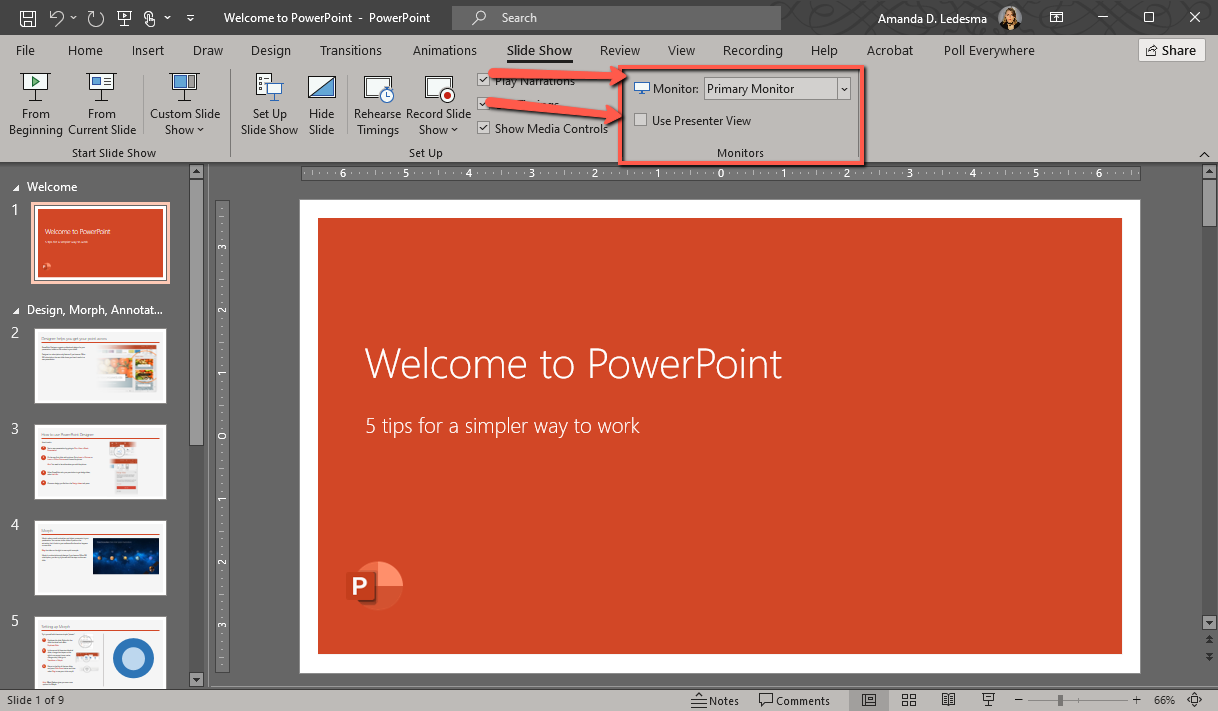
First, open a Powerpoint presentation and navigate to Slide Show.
Next, locate the checkbox labeled Use Presenter View and check the box. This will turn on presenter view. If you attempt start the presentation, you should see your notes appear on one of the monitors.
Note:If your notes appear on the wrong monitor, simply click on the drop down next to Monitor in the same area as the checkbox and choose a different monitor.
The Lectern
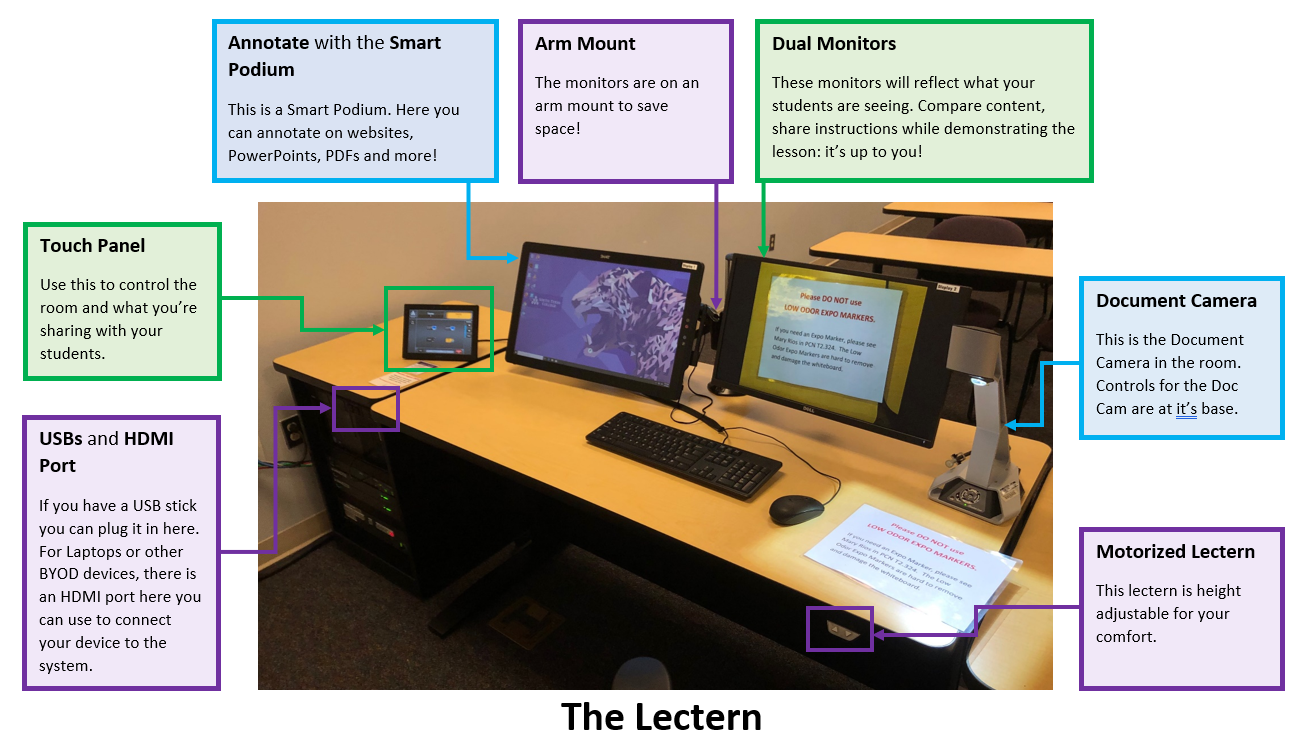
- Annotate with the Smart Podium: The room has a Smart Podium. On it you can annotate on websites, PowerPoints, PDFs, and more!
- Arm Mount: The monitors are on an arm mount to save space!
- Dual Monitors: The dual monitors at the lectern will reflect what you’re students are seeing. Compare content, share instructions while demonstrating the lesson: it’s up to you!
- Touch Panel: Use the touch panel to control the room and what you’re sharing with your students.
- USBs and HDMI Port: The lectern has an area where you can plug in a USB stick for accessing files and an HDMI port for screen sharing your laptop or tablet.
- Document Camera: The room has a document camera. Controls for the doc cam are at it’s base.
- Motorized Lectern: The lectern in the room is height adjustable for your comfort.
The Touch Panel
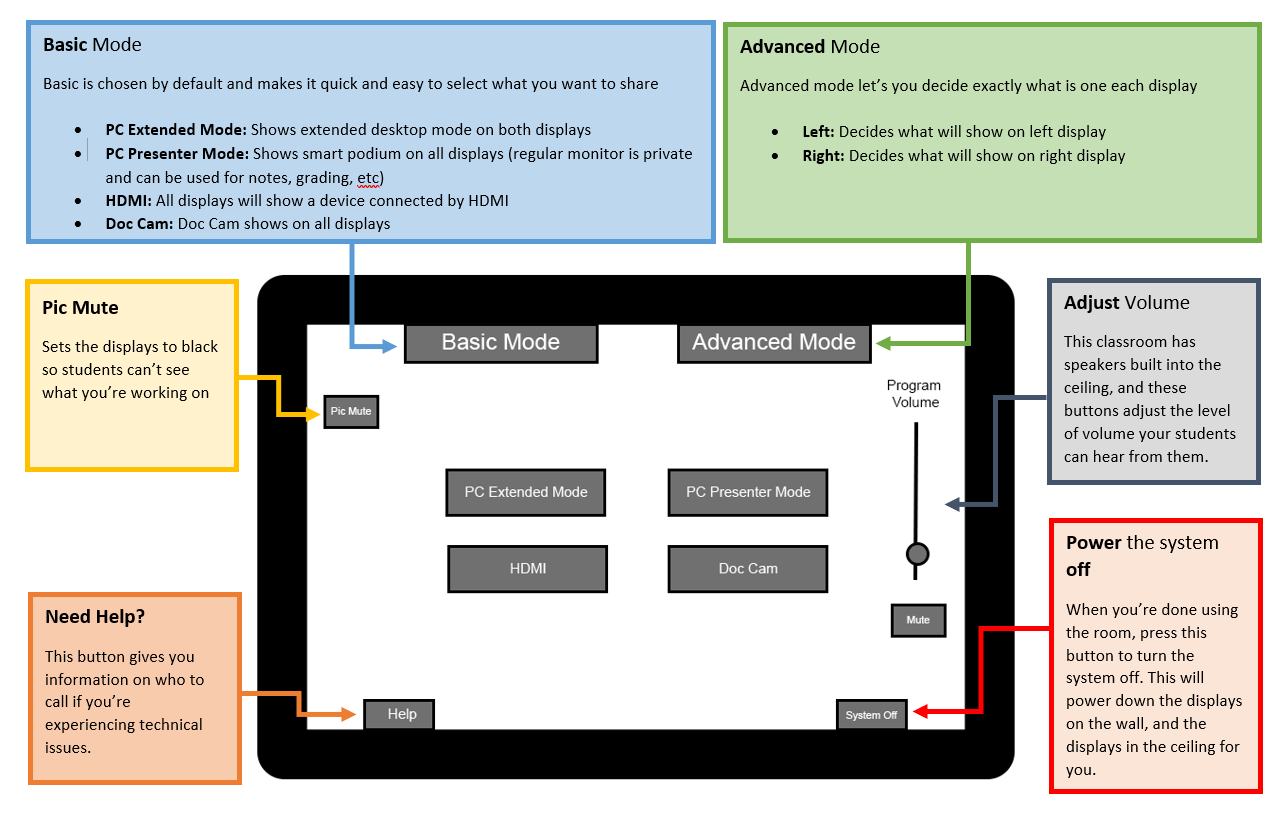
- Basic Mode: Basic mode is chosen by default and makes it quick and easy to select what you want to share.
- PC Extended Mode: Shows extended desktop on both displays.
- PC Presenter Mode: Shows smart podium on all displays (regular monitor is private and can be used for notes, grading, etc)
- HDMI: All displays will show a device connected by HDMI
- Doc Cam: Doc Cam shows on all displays
- Advanced Mode: Advanced mode let’s you decide exactly what is one each display
- Left Display: Decides what will show on left display
- Right Display: Decides what will show on right display
- Pic Mute: Sets the displays to black so students can’t see what you’re working on.
- Need Help?: This button gives you information on who to call if you’re experiencing technical issues.
- Adjust Volume: This classroom has speakers built into the ceiling, and these buttons adjust the level of volume your students can hear from them.
- Power the system Off: When you’re done using the room, press this button to turn the system off. This will power down the displays on the wall, and the displays in the ceiling for you.
The Smart Podium is an interactive monitor that let’s you touch and annotate.

Smart Podium Tutorials
- [VIDEO] Getting Started Tutorial Video
- [ARTICLE] Smart Notebook Basic Tutorials
If you’re signing into Smart Notebook on the computer in PCN T 2-502 for the first time, you’ll be asked to sign in. Select the Microsoft option to use your STC Username and Password.
- Using PowerPoint in Presenter Mode?
Want to see your presentation notes on the private monitor while using PowerPoint? Here’s how you can set this up:

First, open a Powerpoint presentation and navigate to Slide Show.
Next, locate the checkbox labeled Use Presenter View and check the box. This will turn on presenter view. If you attempt start the presentation, you should see your notes appear on one of the monitors.
Note:If your notes appear on the wrong monitor, simply click on the drop down next to Monitor in the same area as the checkbox and choose a different monitor.
Suggestions/Improvements?
Didn’t find the information you were looking for on this page?
